Saturday, 28 August 2010

Cameras, Chester and a Card

***Warning, picture heavy post***

Last Sunday was my birthday and as a present Mr Crafty Blogger paid for me to do a 1:1 photo course with the photographer and crafter extraordinaire the wonderful Kirsty Wiseman.

So last Friday I headed off to meet Kirsty.  I had a fantastic day and learnt loads about portrait photography and editing which enhances rather than destroys photos.  Although I could already shoot semi-auto and manual Kirsty managed to increase my confidence and prove that with a few tweaks I can get some great shots from my camera.  Here's a couple of shots from the day:

First this is me taken by Kirsty with my camera (pic from Kirsty's blog):


and here's one I took of Kirsty:


If you have a DSLR camera I cannot recommend the course highly enough!  If you are a beginner to DSLR photography it will save you months of reading manuals, tutorials and books.  If you know a bit more about it like I did it will increase your confidence and teach you lots of invaluable tips and tricks.

On Saturday I celebrated my birthday with friends and a trip to Chester Races.  A while ago I blogged about my intention to make a dress and I am pleased to report that I did make one and wore it to the races.  (It nearly didn't make it as I was still hemming it at 12.30am on Friday morning).

Here's a pic of me (on the left) and a friend waiting for the train to Liverpool.  It has to be said we got some funny looks when we boarded.


Once we got to Lime Street station there were a lot more race-goers knocking about so we blended in a bit more.  By the time we got to Chester we looked normal and after a lovely pub lunch we joined the hoardes of people heading to the course:


I had never been to the races before and my previous betting experience was limited to an annual flutter on the Grand National.   However I did manage to pick one winner (out of 8 races) and I did finish 'up' by £2.50.  Mr Crafty Blogger did significantly better, backing 4 of the 8 winners.    Here he is "studying the form" or whatever you do when you don't pick horses by their name or the jockey's silks:

(photo was taken on my mobile.  If you have an Android phone download Vignette, it's great fun)

Fortunately Mr Crafty Blogger's success meant the drinks were on him!


Finally as this is a craft blog I thought I had better share a card.  This is the thank you I made for Kirsty following the photo course:


Ingredients:  Basic Grey Offbeat paper, Quickutz and Cuttlebug alphabet dies, mini bulldog clip from Paperchase, Fiskars threading water punch.


Thanks for looking,
Ruthie x

Saturday, 14 August 2010

It's Tree-mendous.............

...... I've made a Christmas card, and it's only August!

It's all Jo's fault over at Daring Card Makers:


Tree-mendous!

I would like to see cards this week featuring a tree! Some of the Daring Cardmakers may have groaned slightly when I mentioned Christmas trees(Kathy!) but it doesn't have to be a festive tree, green trees, apple trees, stamped trees, sticker trees, paper pieced trees - anything goes, as long as it is a tree!

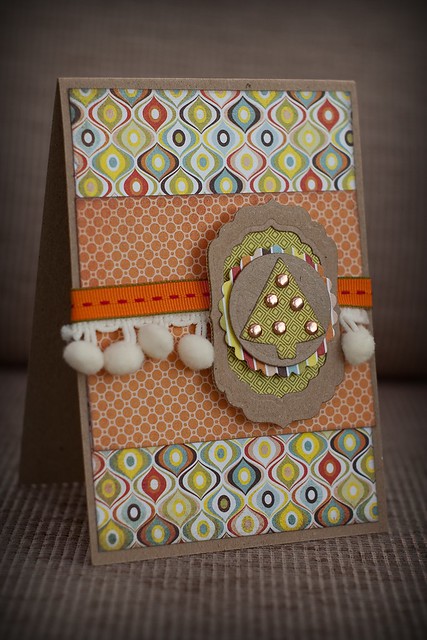
I recently bought the Basic Grey Offbeat papers which put me in mind of Christmas decorations in a very retro 1970s way.  Perfect, I could make a Christmas card without having to delve into anything too snow covered and festive:
Christmas Tree Card

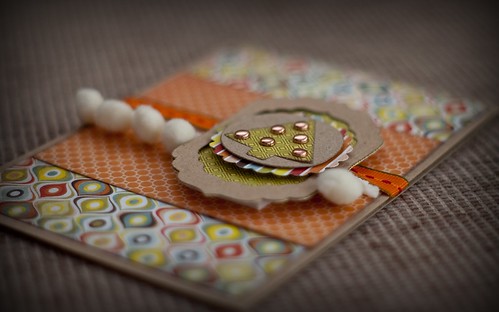
Christmas Tree Card (2)

Ingredients: Paper - Basic Grey Offbeat, Nestabilities labels, circles and scalloped circle dies, Sizzix Sizzlits Tree die, pom poms from Aberkan, ribbon and brads from stash.

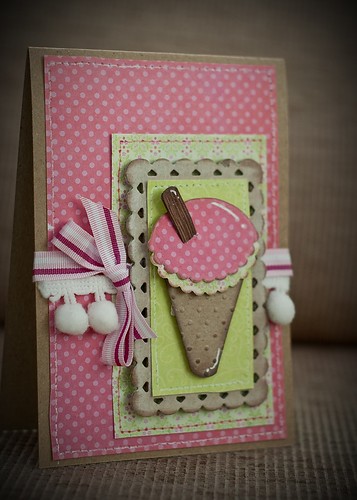
The layout of the card was based on another card I made earlier this week which has a much more summery feel!:

icecreamcard

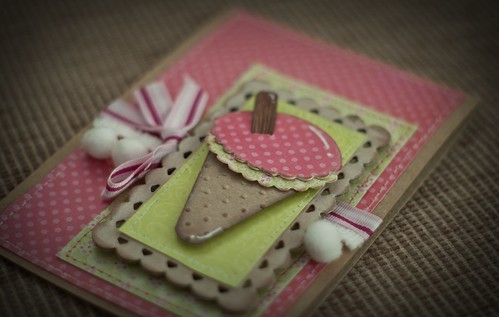
Ice Cream Card (2)


Ingredients: Papers - My Minds Eye (magazine freebie!), paper-pieced ice cream made with a mixture of hand cutting and Nestabilities dies, Nellie Snellen frame die, pom poms from Aberkan, ribbon from stash, inking and pen stitching.

Thanks for looking,

Ruthie x

Sunday, 8 August 2010

Sculpted Paper Roses

You will have probably noticed that sculpted paper roses are everywhere at the moment.  Prima do them and YouTube is full of tutorials on how to make them.

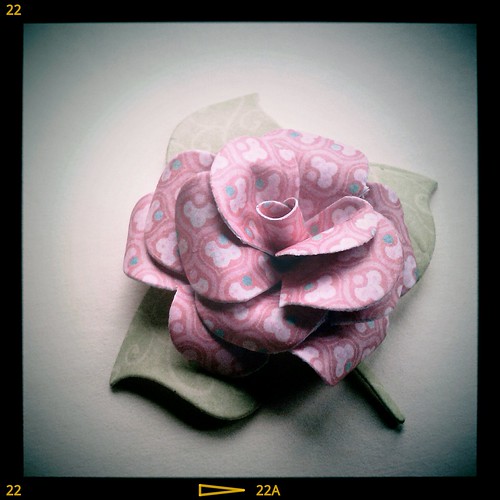
I started having a go at making them a couple of weeks ago with very limited success (by "limited" I actually mean NO success).  However, yesterday I had a bit of a breakthrough and managed to make this:

Paper Rose

Sculpted paper rose


Most tutorials rely on using a 6 petal flower punch or die which I didn't own so my early (failed) attempts involved hand cutting the flowers.  This works well if you are very good with scissors, but unfortunately mine looked like I done them blindfolded with blunt scissors!

After trying and failing with the scissors I went punch/die hunting.  I ruled out getting a punch as they cost about £10 and I find their use quite limited.  A die seemed a more sensible option as I have a Cuttlebug so next stop was the Sizzix range.

I decided that the new Sizzix Tim Holtz Alterations Tattered Florals die was what I needed.  Unfortunately these dies seem to be in pretty short supply and are going for silly money on Ebay so no luck there.

Luckily during my Sizzix hunt I stumbled across this die set from Marianne D:
141454-lr0131.jpg


Not only is it perfect for making paper roses but I will also get loads of other uses out of it as a normal die. 

Anyway, enough of my shopping, back to the paper roses.  As you may have gathered I cut the petals and leaves using the die.  Both are cut from My Minds Eye paper which I stuck together to make double sided.  The method for assembling the rose was based on a hybrid the following tutorials:

Splitcoast Stampers Tutorial  (this one uses the elusive Tim Holtz Die)


To finish the leaves I curled them round a pencil like the flower petals.

Thanks for looking and sorry for the slightly arty pics. Can you tell my latest obsession is my new Android phone and the Vignette app!

Ruthie x


Sunday, 11 July 2010

A Twihard Birthday

Well Twilight mania  has well and truly passed me by.  I've not read any of the books or seen the films (I'm much more of a True Blood girl).   However, I happen to know a young lady who is Twilight mad and has a birthday coming up so it calls for a suitable birthday card.

As I said, I'm not that well up on the adventures of Edward, Jacob or Bella so a bit of interweb research was required.  One of the first things I found was THIS amazing cake, inspired by the Twilight series book covers.

The cake provided suitable inspiration and this is what I came up with:


Ingredients: Hand cut and paper-pieced chess pieces and apple; Nestabilities labels die; Cuttlebug embossing folder and corner die; ticket made from a Sizzix ticket die and text printed in Photoshop; flower and ribbon from stash, heart pin from local market, Poundland self adhesive gem, patterned paper download from Summertime Designs and a bit of inking to finish.

After reading all the stuff on the interweb I am tempted to give the books a go!

Thanks for looking,

Ruthie x

Wednesday, 23 June 2010

Boys, Boys, Boys!

All I seem to be doing at the moment is male cards which is driving me mad!

Last weekend was Father's Day so here's the cards I made for my dad and father in-law

My dad:


Ingredients: All papers are October afternoon, faux chipboard letters made with scrap cardboard and Cuttlebug dies, hand-cut and paper-pieced boat.

My father in-law:

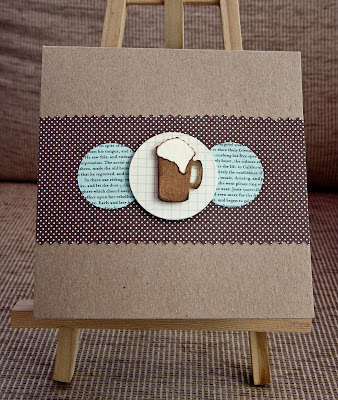
Ingredients: All papers are October afternoon and I dug out the old male standby of the Quickutz beer mug die.

Even new babies did not provide any escape from the male card making with two new baby boys putting in an appearance in the last few weeks.  It's a good job I recently invested in the cuttlebug aeroplane die!

Papers are October afternoon (just for a change!), Cuttlebug aeroplane die, Making Memories trim, hand written greeting, buttons from stash and a bit of pen stitching.


Ingredients: Paper is from an old DCWV pack, background embossed with a Cuttlebug embossing folder, felt plane cut with the Cuttlebug die, pom-poms from Aberkhan and gingham ribbon from stash.

Thanks for looking.  I'm off now to make another card, and yes it's for a bloke!

Ruthie x

Wednesday, 12 May 2010

Strawberry Fields Forever

My recent crafting has accidently taken on a strawberry theme.  I've found my recent craft related purchases all involve strawberries in some way or another.  This was totally unplanned, but so far I've got strawberry print paper, fabric (for dressmaking) and a strawberry themed pin cushion (to use when dress making, but it also inspired a card).

More of the dressmaking later, but first a strawberry themed card:
Easel 50th Birthday Card
Ingredients: Paper - October Afternoon, felt from stash, Dovecraft brads, ribbon from stash, Fiskars punch, Nestabilities, Cuttlebug and Quickutz dies, pen stitching.

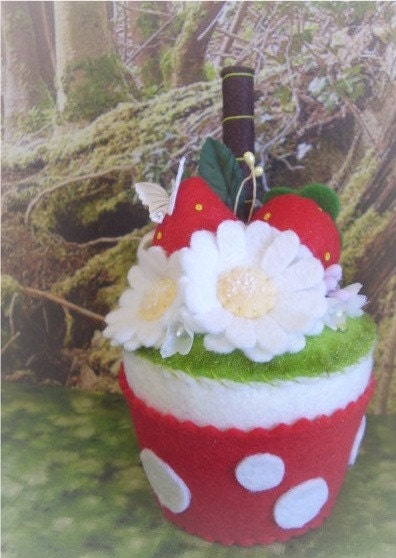
As I said, the card was inspired by my fab new pin cushion which I bought from NicolaLuke on Etsy:
It looks cute in the photo, but it is even better in real life.  The detail is amazing and  I feel guilty sticking pins in it.  (Nicola also has a blog with details of her fab creations - check it out here.)

As I said on my last post, I have acquired a sewing machine with the intention of making a dress.  I am happy to say there has been significant progress on this, and not just buying the aforementioned pin cushion. I have infact made a 'practise' dress!
I am going to the races this summer and decided I wanted to make my own dress.  With my very limited sewing and dress making experience I knew I would need a pattern so I picked this one from Vogue Easy Options:
I also decided it might be an idea to buy some cheap fabric to practise on, which just so happened to have a strawberry print.  I set to work with my 'practise' fabric and this is the [nearly] finished dress:
It looks a bit odd on the hanger, but I can say it looks very nice on.  In this photo it's not been hemmed and there is no zip in it, but I was very pleased to get this far without major incident.  I even managed to do the lining.   My vanity meant that I cut the pattern a size smaller than I should have done, but that's why I chose to do a practise dress before the real thing.
Finally, here's a shot of all my strawberry items together:
Thanks for looking,
Ruthie x

Wednesday, 28 April 2010

A Two Challenge Combo, and A New Toy

This week I've managed to combine two challenges into one card.
Keryn set the dare over on Daring Card Makers...

It's Keryn here this week and I've been lucky enough to get my hands on a 'Big Shot' die cut machine and I'm loving it. I want any excuse I can find to make cards, well anything really using die cuts. This week I want you to play with me. Dig out your dies and your die cut machine. Cut shapes of any size and theme you please and use at least one on your card for this week.

 I combined it with Kazan's sketch over on 2 Sketches For You and came up with this:
 
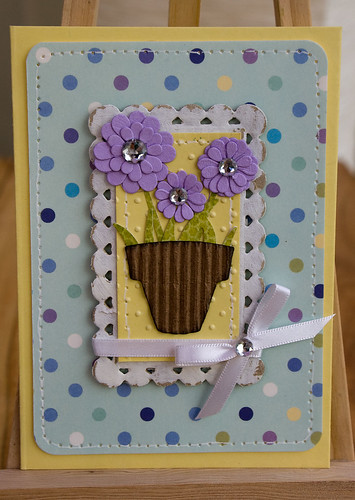
Die Cut Flowers Card (1)


Die Cut Flowers Card (2)


Ingredients:
Dies (as per Keryn's dare): Nellie Snellen frame (painted with acrylic and sanded); flowers made with Cuttlebug asterisks; Sizzix flower pot; Quickutz grass
Cuttlebug embossing folder
Poundland gems
Ribbon from stash
Papermania paper
Pen stitching

As well as card making, I'm trying to expand my crafty repertoire and this week I acquired this..
1960s Alfa 365 Electric Sewing Machine
..Mum's old sewing machine.  It's older than me, but still works a treat (and weighs a ton).

No more pen stitching on cards for me, I'm going for the real deal.  I've even bought some separate needles to use on paper.

I've not just got the machine for my paper crafts, I am attempting to make a dress! It may take some time as the last time I did any sort of dressmaking/machine sewing was at school in about 1987, and I think my Mum ended up finishing it off!

Cheers

Ruthie x